Alright, so folks have been asking how I put together that sauna in my basement. It wasn’t exactly a walk in the park, but then again, nothing worthwhile ever is, right? I figured I’d jot down how it all went, from start to finish, just in case anyone else is feeling brave, or maybe just a bit foolish like I was.
Getting Started – The “Why” and the “Where”
It all kicked off a couple of years back. Work was a nightmare, real pressure cooker stuff. I’d come home feeling like a wrung-out dishrag. My wife, bless her, suggested I find a hobby. I think she was picturing model trains or something. But I remembered this old Finnish guy I worked with years ago, always going on about his sauna. Said it was the only way to truly unwind. That stuck with me. So, I thought, why not build one? Seemed like a proper challenge.
Now, the idea of building a sauna came about after a particularly stressful period. I’d been working on this massive project at my old job, the kind where you’re pulling all-nighters and living off stale coffee. We launched, and it was a disaster. Not my fault, mind you, but you know how it is, heads gotta roll, or at least look like they’re rolling. My boss, old Henderson, a man who couldn’t manage a two-car funeral, started pointing fingers. Long story short, I was “restructured” out of a job. Just like that. Found myself with a lot of time on my hands and a fair bit of simmering anger. My wife said I needed to channel that energy. So, a sauna it was. A place to sweat out the frustration, I figured.
First thing was figuring out where to stick this contraption. The garage was out – too cold in winter. Spare room? Nah, the wife had plans for that. So, the basement it was. A bit dingy, a bit damp, but it had the space. I cleared out a corner, a good _8x6 foot_ spot, felt about right.
The Bones of the Beast – Framing and Insulating
Then came the framing. Just your standard 2×4 lumber. I’m no master carpenter, but I can knock a few bits of wood together. Measured twice, cut once… mostly. There were a few “creative adjustments” along the way, let’s call them. Put up the walls, then the ceiling joists. It started looking like a very small, very woody room. Which, I guess, was the point.
Next up, insulation. This part, I won’t lie, was a pain. Used that rockwool stuff. Itchy as all get-out, even with gloves and a mask. But you can’t skimp on insulation, not for a sauna. You want that heat to stay in the sauna, not warm up your concrete foundation. So, I gritted my teeth and stuffed every cavity. Then, a vapor barrier. This is super important, folks. That foil-backed stuff. Stapled it all over the inside of the insulation, shiny side in. It stops the moisture from getting into your walls and turning your hard work into a moldy mess.
Getting Wired and Paneled
Electricity. Now, I’m okay with basic wiring, changing a light fixture, that sort of thing. But for the sauna heater, that’s a different kettle of fish. Big power draw. So, I did the smart thing and called in a proper electrician. My mate Dave, he’s a sparky. He ran the heavy-duty cable from the main panel, hooked up a dedicated breaker, and got the wiring sorted for the heater and a small, heat-resistant light. Best money I spent on the whole project, probably. Don’t mess with electricity, kids.
With the scary electrical stuff done, it was time for the pretty part: interior paneling. I went with cedar. Yeah, it’s a bit more expensive, but man, the smell. Worth every penny. Tongue and groove planks. Started from the bottom, worked my way up. Slow work, careful with the nailing so you don’t split the wood. But seeing those cedar planks go up, that’s when it really started to feel like a sauna. Smelled amazing in there already.
Benches, Heater, and the First Sweat
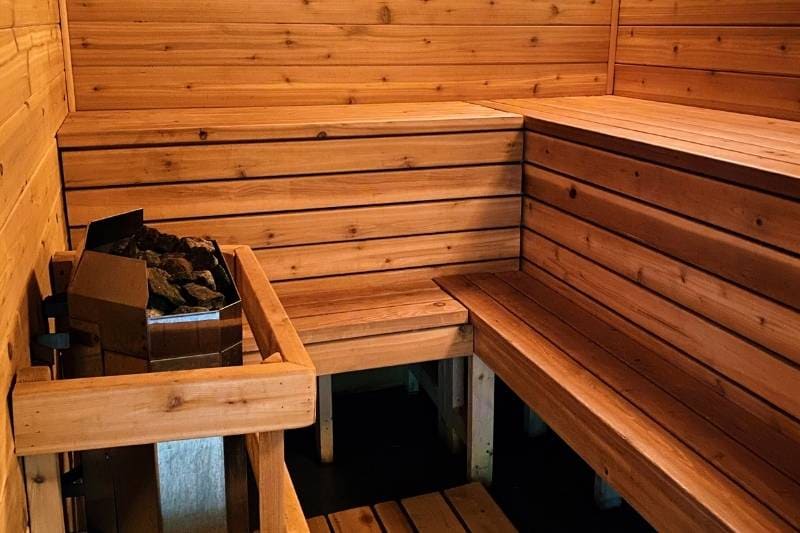
Then, the benches. Again, cedar. Made a two-tier design. A lower bench and a higher one. Simple, sturdy. Sanded everything smooth as a baby’s bottom. You don’t want splinters when you’re trying to relax, believe me.
The heater itself. I bought a decent electric one, sized right for the room. Mounting it to the wall was straightforward enough, following the instructions. Then Dave, the electrician, came back to do the final hook-up to the wires he’d run earlier.

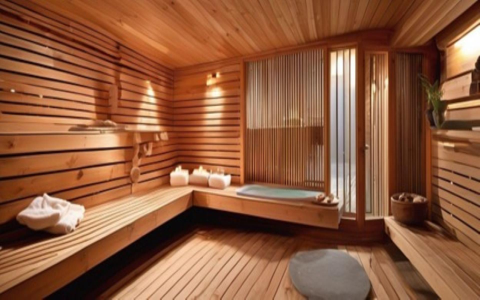
Finally, the door. Got a proper sauna door, tempered glass, with a good seal. Hung that, put a wooden handle on it. Stood back. It looked… well, it looked like a sauna!
The moment of truth. Flipped the breaker, turned on the heater. Waited. It took a while to get up to temperature that first time, maybe an hour or so. I chucked a bit of water on the rocks. That hiss! That wave of steam! Stepped inside, sat down. And just… sweated. All that work, all that frustration from the old job, it just seemed to melt away. It actually worked.
Final Thoughts
So, that’s the gist of it. It was a fair bit of work, spread over a few weekends. There were moments I wanted to throw my hammer through the wall, especially when a measurement was off or a piece of wood just wouldn’t cooperate. But looking back, pretty chuffed with how it turned out. It’s not perfect, there’s a slight draft near the bottom of the door I still need to sort, and keeping it clean is a bit of a chore, but it’s my sauna. Built it with my own two hands. And honestly, after a long day, there’s nothing quite like it.
If you’re thinking of doing it, my advice? Plan well, take your time, and don’t be afraid to ask for help with the bits you’re not sure about, especially the electrics. It’s a rewarding project, for sure.